I used to think visiting all five Utah National Parks in one week was just another Instagram challenge—something influencers did for content while missing the actual experience. Then last June, six months into our full-time van life journey, we decided to test whether the “Mighty 5 Challenge” was actually doable without losing our sanity or our love for these incredible places. Spoiler alert: it’s absolutely exhausting and completely worth it.
Here’s exactly how we tackled Utah’s Big Five in seven days, what it really costs, and why this might be the most rewarding week of your van life journey—especially if you’re still in that exciting “everything is new” phase of full-time van life like we were.
Why we chose a pre-built van (and how it changed our Utah experience)
We bought our van already built out from VanLifeTraders in October, thanks to a lovely couple in Michigan who had done an incredible job with the conversion. Starting full-time van life in January meant we hit Utah as relative newbies—just six months in—but with a reliable, well-designed home on wheels.
Why the pre-built route worked for us:
- Professional electrical system handled our camera charging needs
- Proper insulation kept us comfortable in Utah’s temperature swings
- Proven layout meant we knew our space well by Utah
- Quality build gave us confidence on mountain roads
- Previous owners’ experience showed in thoughtful details
Having a dependable van was crucial for the Mighty 5 challenge. We never worried about mechanical issues, and the efficient layout meant quick pack-ups when moving between parks.
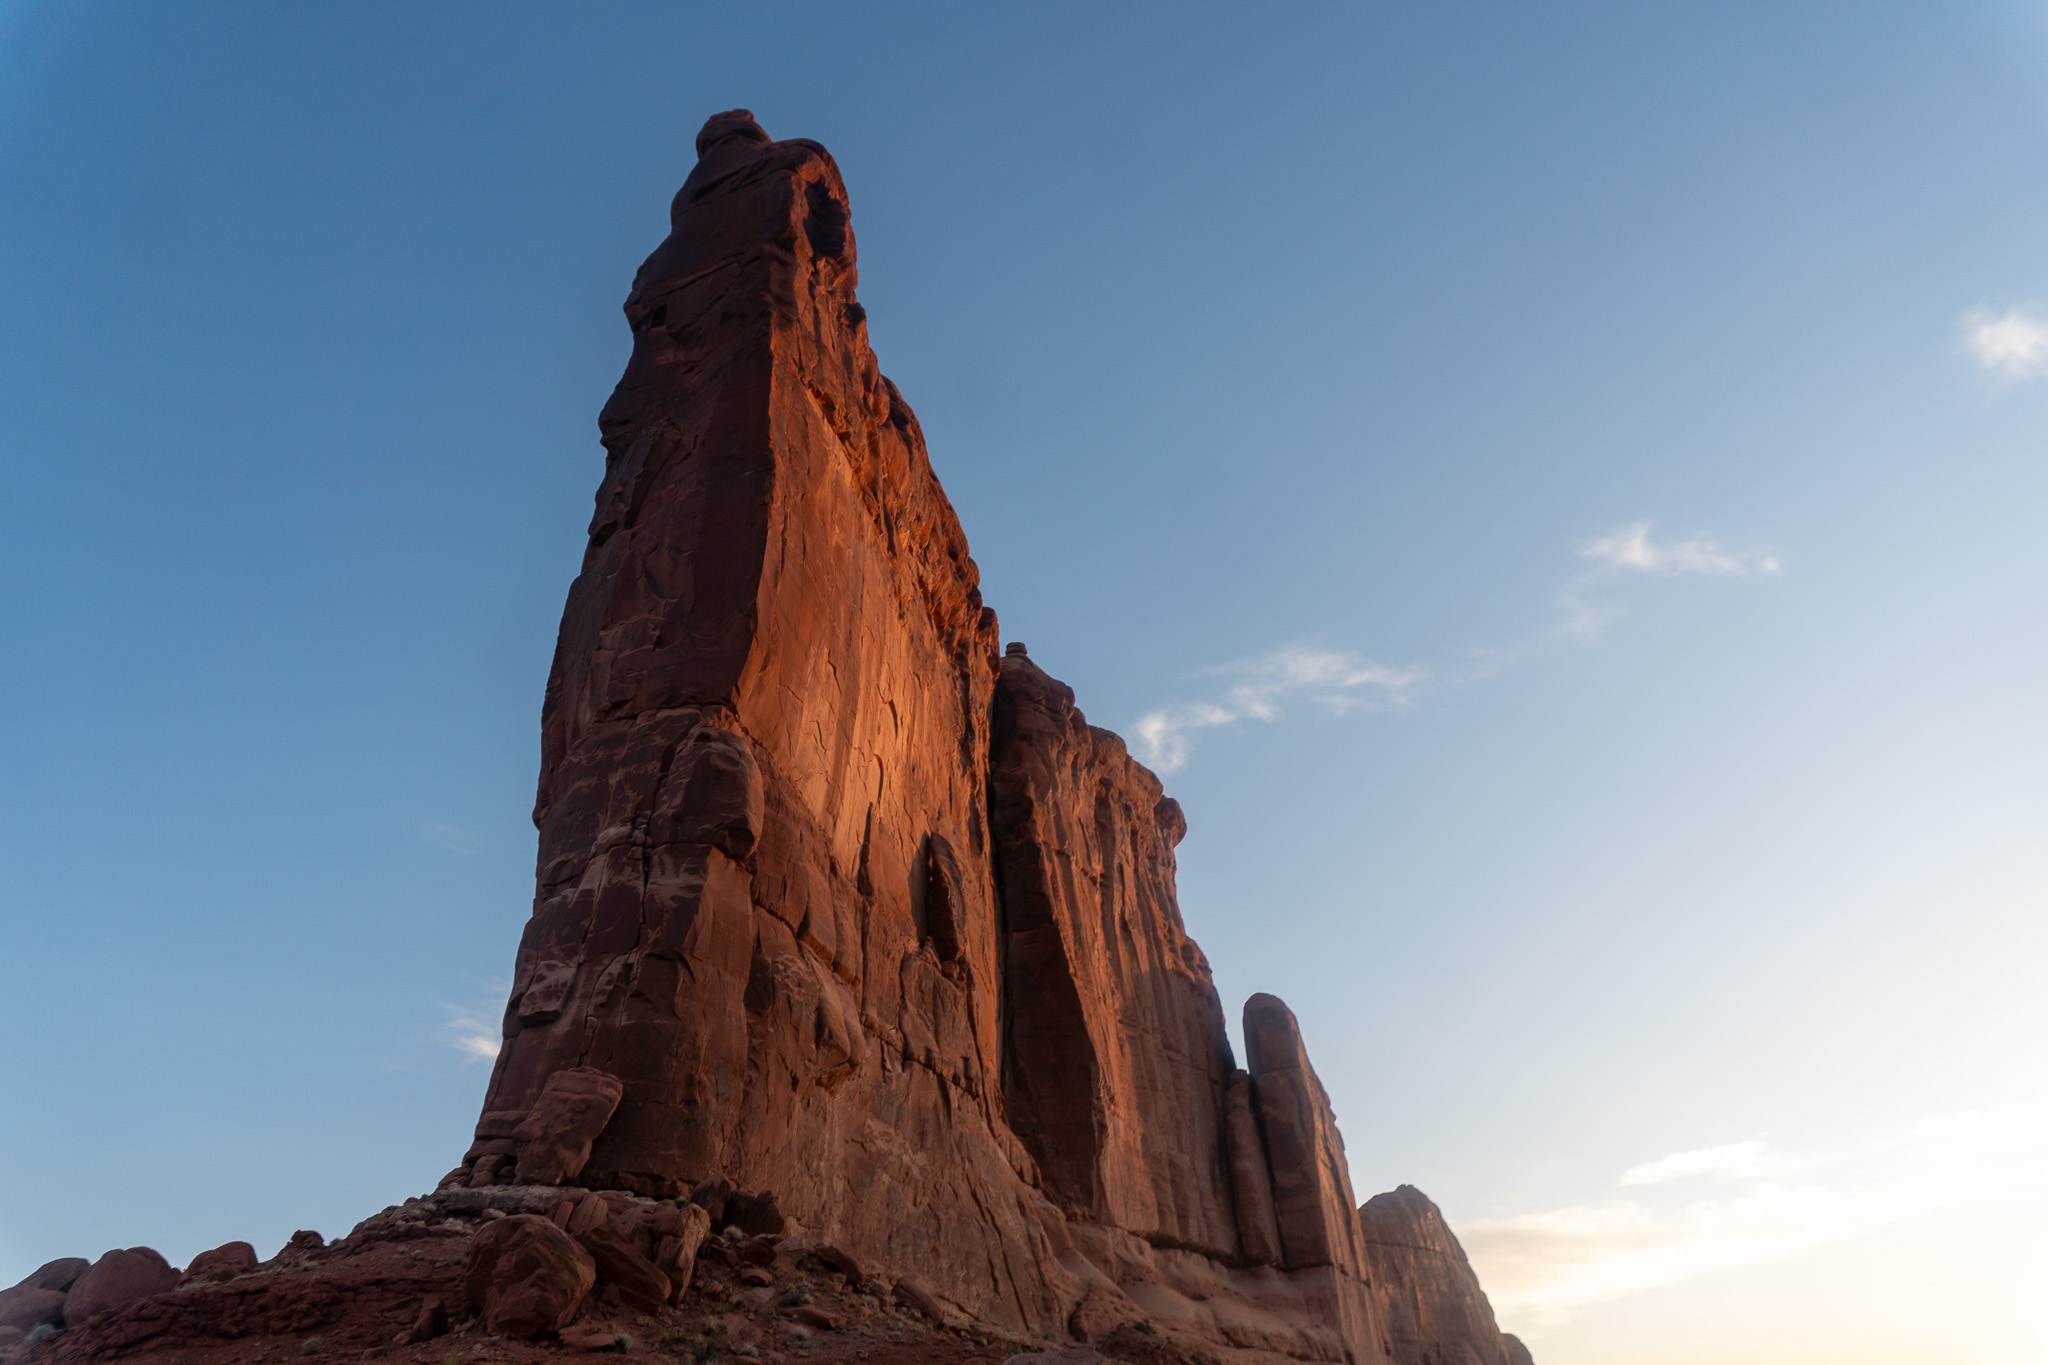
Why we spent half our time in Zion (and you should too)
Most van lifers I’ve met either rush through Utah in 3-4 days (missing way too much) or spend months there (which isn’t realistic for everyone). After mapping out what we actually wanted to experience, we realized that Zion deserved the lion’s share of our time—and we were absolutely right.
We stayed at Watchman Campground from June 1st through the 4th, giving us three full days in Zion before tackling the other four parks. This wasn’t the typical “equal time” approach most articles recommend, but it was perfect for our priorities.
The real costs: Budget breakdown from our week
Let me be upfront about expenses because most articles skip this crucial detail:
Total week cost: $647 (split costs where noted)
- National Parks Annual Pass: $80 (pays for itself immediately)
- Gas: $387 (1,347 miles total in our pre-built Transit)
- Campgrounds: $124 (Watchman split 4 ways + free national forest camping)
- Food: $142 (eating out twice, mostly van cooking)
- Miscellaneous: $14 (propane refill, park maps)
Money-saving game changers:
- Splitting Zion costs with friends: We shared Watchman Campground with two other friends, cutting our camping costs by 75% and creating incredible shared memories
- Free national forest camping: For Bryce, Capitol Reef, Canyonlands, and Arches, we found free spots in nearby national forests—often with better views than paid campgrounds
- The Dyrt app: Our secret weapon for finding both paid and free camping spots, plus water locations
Budget reality: We actually spent $50 LESS than a typical week of van life by combining smart camping choices with cost-sharing. The social aspect made everything more fun while saving money.
Our route: Why Zion-heavy makes sense
After talking to dozens of van lifers who’ve done this challenge, most try to split time equally between parks. We went Zion-heavy, and here’s why it worked perfectly:
Days 1-3: Zion National Park (Watchman Campground)
- Shared campground costs with two friends (4-way split!)
- Three full days allowed us to tackle major hikes without rushing
- Group dynamics made Angels Landing attempts more fun and safer
- Shared cooking and campfire stories every evening
Day 4: Zion to Bryce Canyon
- Sunset at Bryce after our final Zion morning
- Found free national forest camping near Bryce using The Dyrt
- Better views than most paid campgrounds
Day 5: Capitol Reef National Park
- Free camping in Dixie National Forest
- Full day for scenic drive and exploration
- Construction updates required flexibility (always check park websites!)
Day 6: Canyonlands National Park
- Free national forest spot with incredible canyon views
- One focused day in Island in the Sky district
- Built anticipation for our Arches finale
Day 7: Arches National Park
- Another free forest service spot near Moab
- Early morning start to beat crowds and heat
- Perfect crescendo to end our week
The friend factor: How sharing Zion changed everything
Splitting our Zion experience with two friends was the best decision we made for both our budget and our memories. Having a group of four in Watchman Campground meant:
Financial benefits:
- Campground costs dropped from $75/night to $19/night per van
- Shared cooking reduced food costs
- Group gear sharing (nobody needed to bring everything)
- Split gas costs for any group explorations
Social magic:
- Built-in hiking partners for challenging trails like Angels Landing
- Evening campfire conversations about the day’s adventures
- Group problem-solving when weather threatened our plans
- Shared excitement made every moment more memorable
- Safety in numbers for early morning and late evening activities
Logistical advantages:
- Someone always available to watch gear during hikes
- Multiple vehicles meant backup plans if mechanical issues arose
- Shared research and planning made decision-making easier
- Group photos that actually included all of us
The free camping game-changer
After Zion, we discovered that national forest camping near Utah’s parks often provides better experiences than paid campgrounds—and it’s completely free. Using The Dyrt app, we found incredible spots that most visitors never discover.
Our free camping strategy:
- The Dyrt app: Essential for finding both dispersed camping and water sources
- National forest boundaries: Most parks have adjacent forest service land
- Elevation considerations: Higher spots offer cooler temperatures and better views
- Water planning: Always know your next water source before leaving civilization
Reality check on free camping:
- No hookups (solar panels and water conservation essential)
- Sometimes rough roads (but our Transit handled everything fine)
- More privacy and often better views than paid campgrounds
- Requires more self-sufficiency but increases the adventure factor
Specific areas that worked for us:
- Dixie National Forest near Bryce Canyon (incredible sunset views)
- Forest service roads near Capitol Reef (quiet and scenic)
- BLM land around Canyonlands (vast open spaces)
- National forest areas near Arches (easy access to park entrance)
What nobody tells you about June weather
June in Utah is a weather wild card that most articles don’t prepare you for. We experienced:
- Storm systems that threatened our Angels Landing plans
- Intense heat building throughout the week
- Perfect conditions mixed with challenging weather
- The magic of being flexible with weather windows
How we adapted:
- Monitored weather obsessively for Angels Landing opportunities
- Started Arches at 5:30 AM to beat the heat
- Embraced stormy conditions for dramatic photography
- Always had backup plans for weather delays
The Angels Landing miracle (and why persistence pays off)
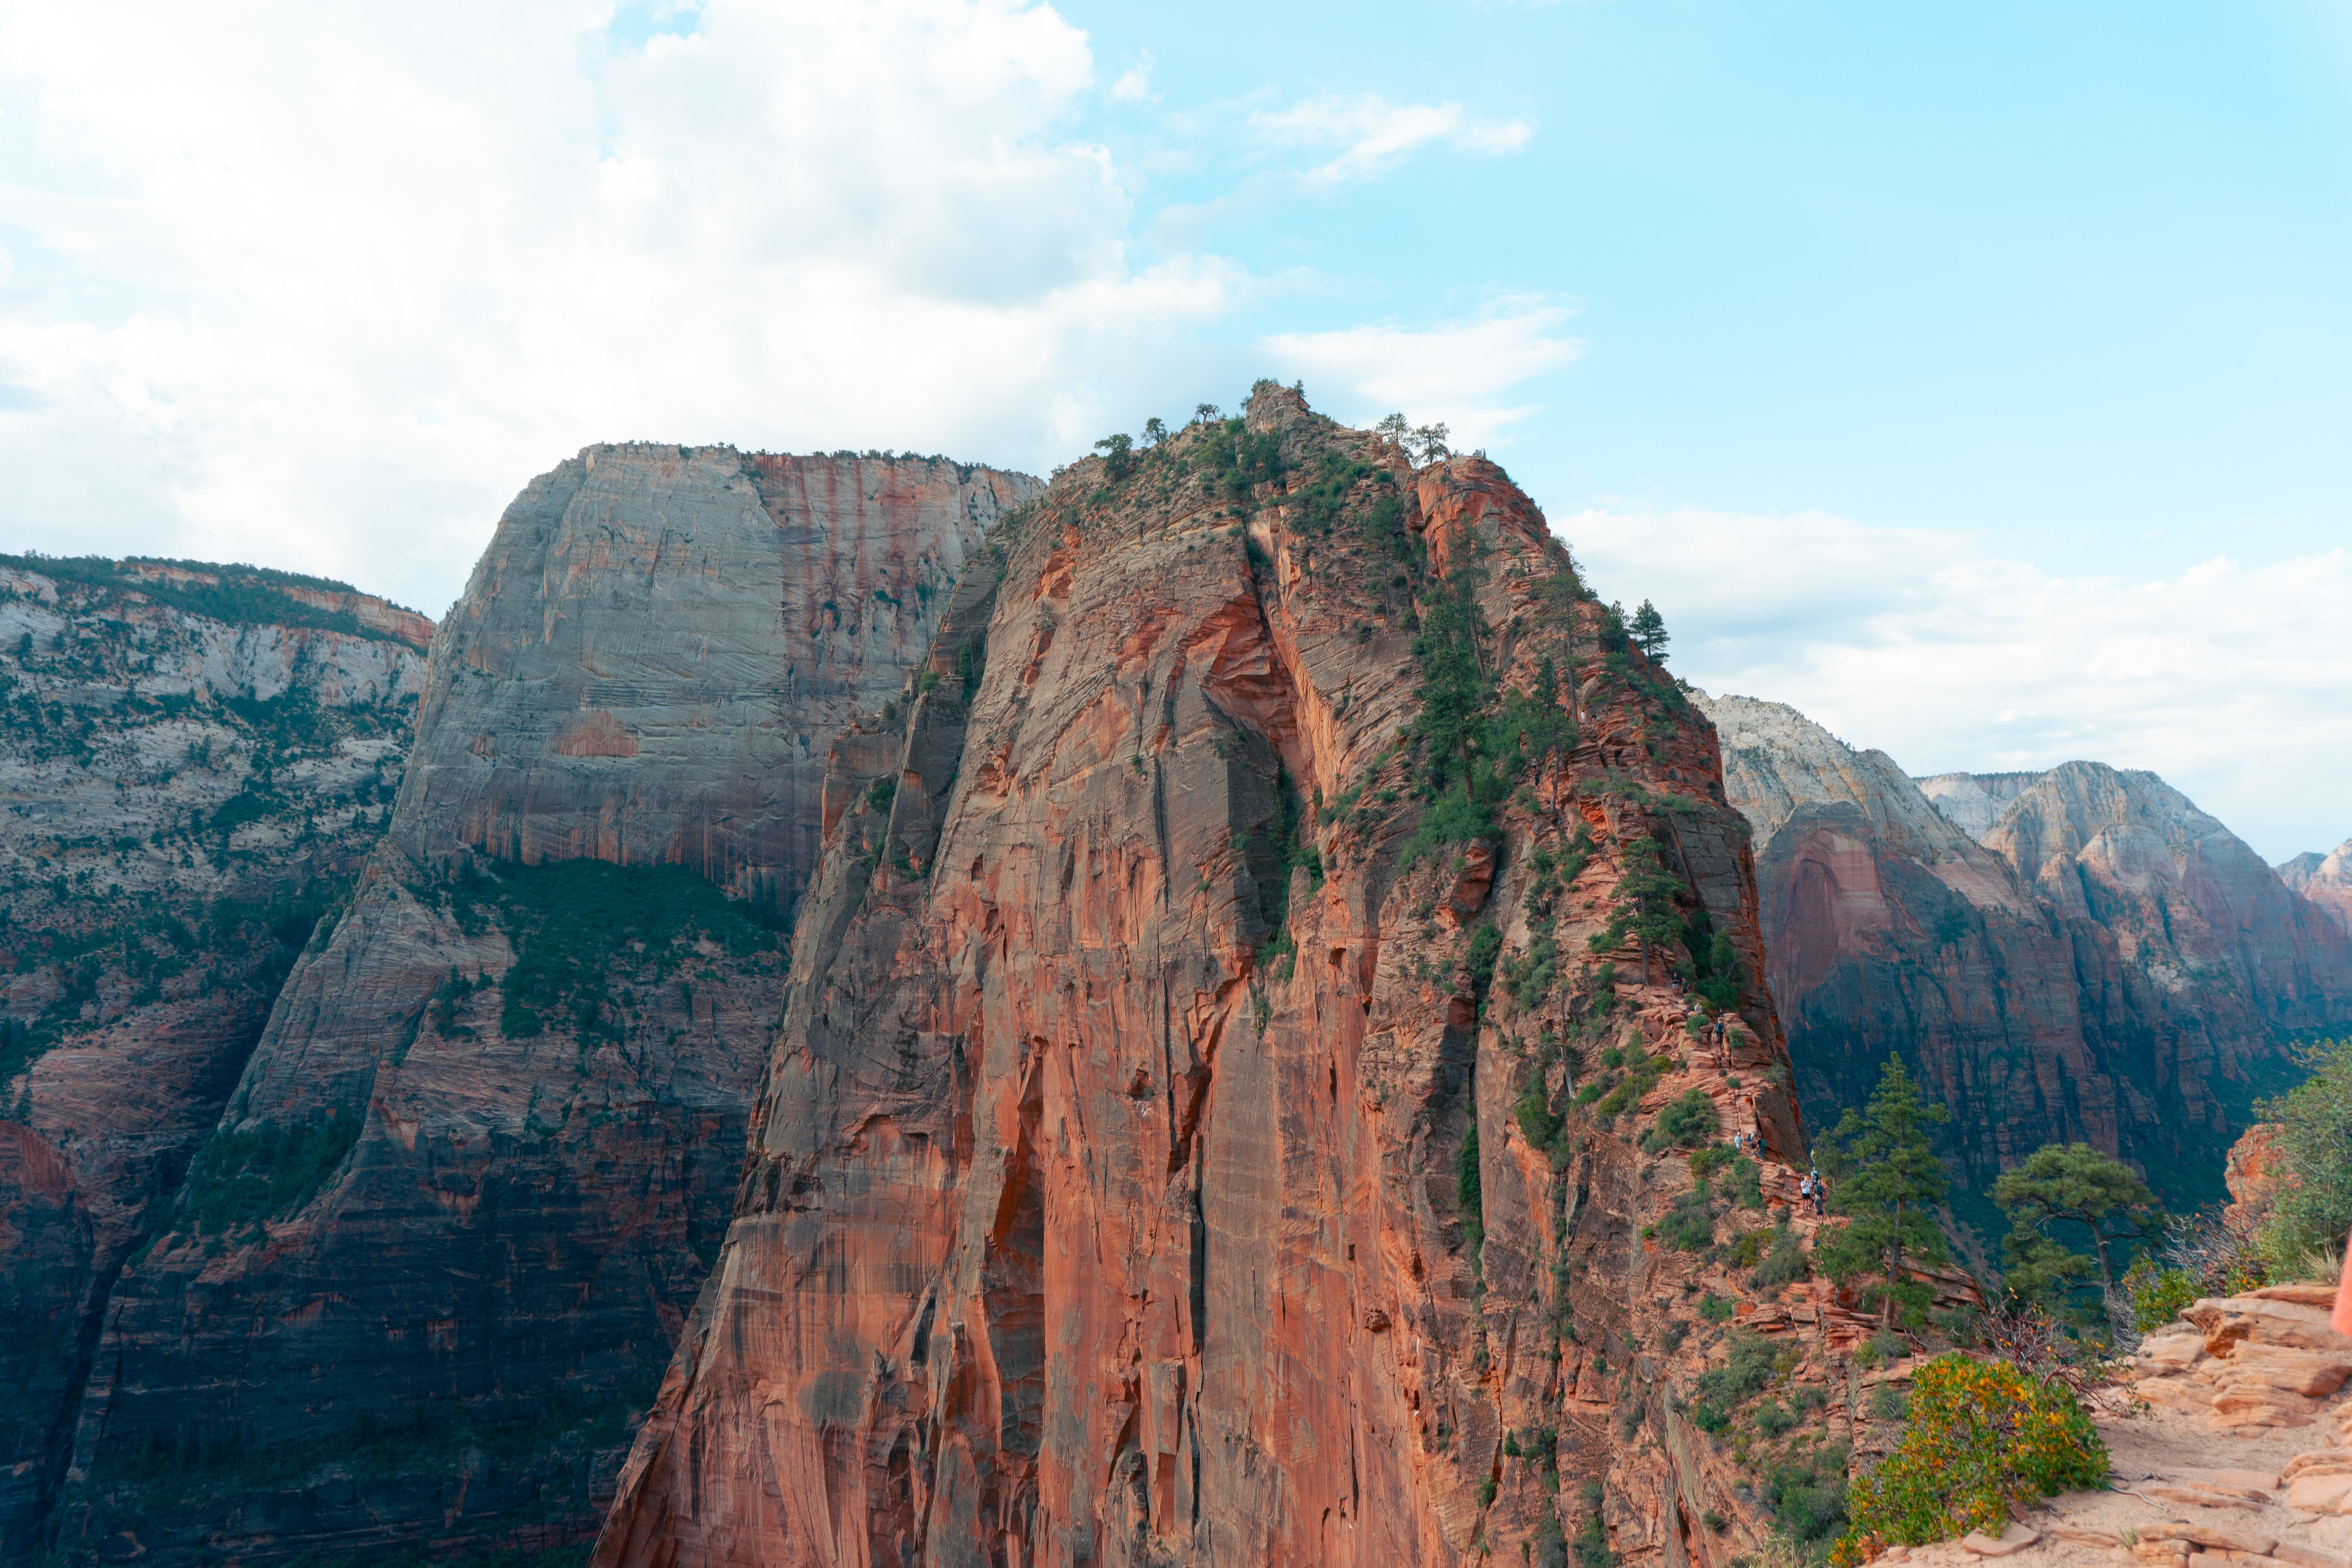
Here’s the thing about Angels Landing that no one tells you: getting permits is just the beginning. Weather, crowds, and your own courage all factor into whether you’ll actually complete it.
We got incredibly lucky and completed Angels Landing twice during our stay. Having friends along made both attempts more enjoyable and safer—we could encourage each other through the scary sections and share the incredible views at the top.
Angels Landing reality check:
- Book permits exactly when they open (varies by season)
- Check weather religiously—storms make it dangerous
- Start early (we left camp at 6 AM both times)
- The mental challenge is harder than the physical one
- Two attempts gave us confidence and different perspectives
The Narrows: Summer hiking game-changer
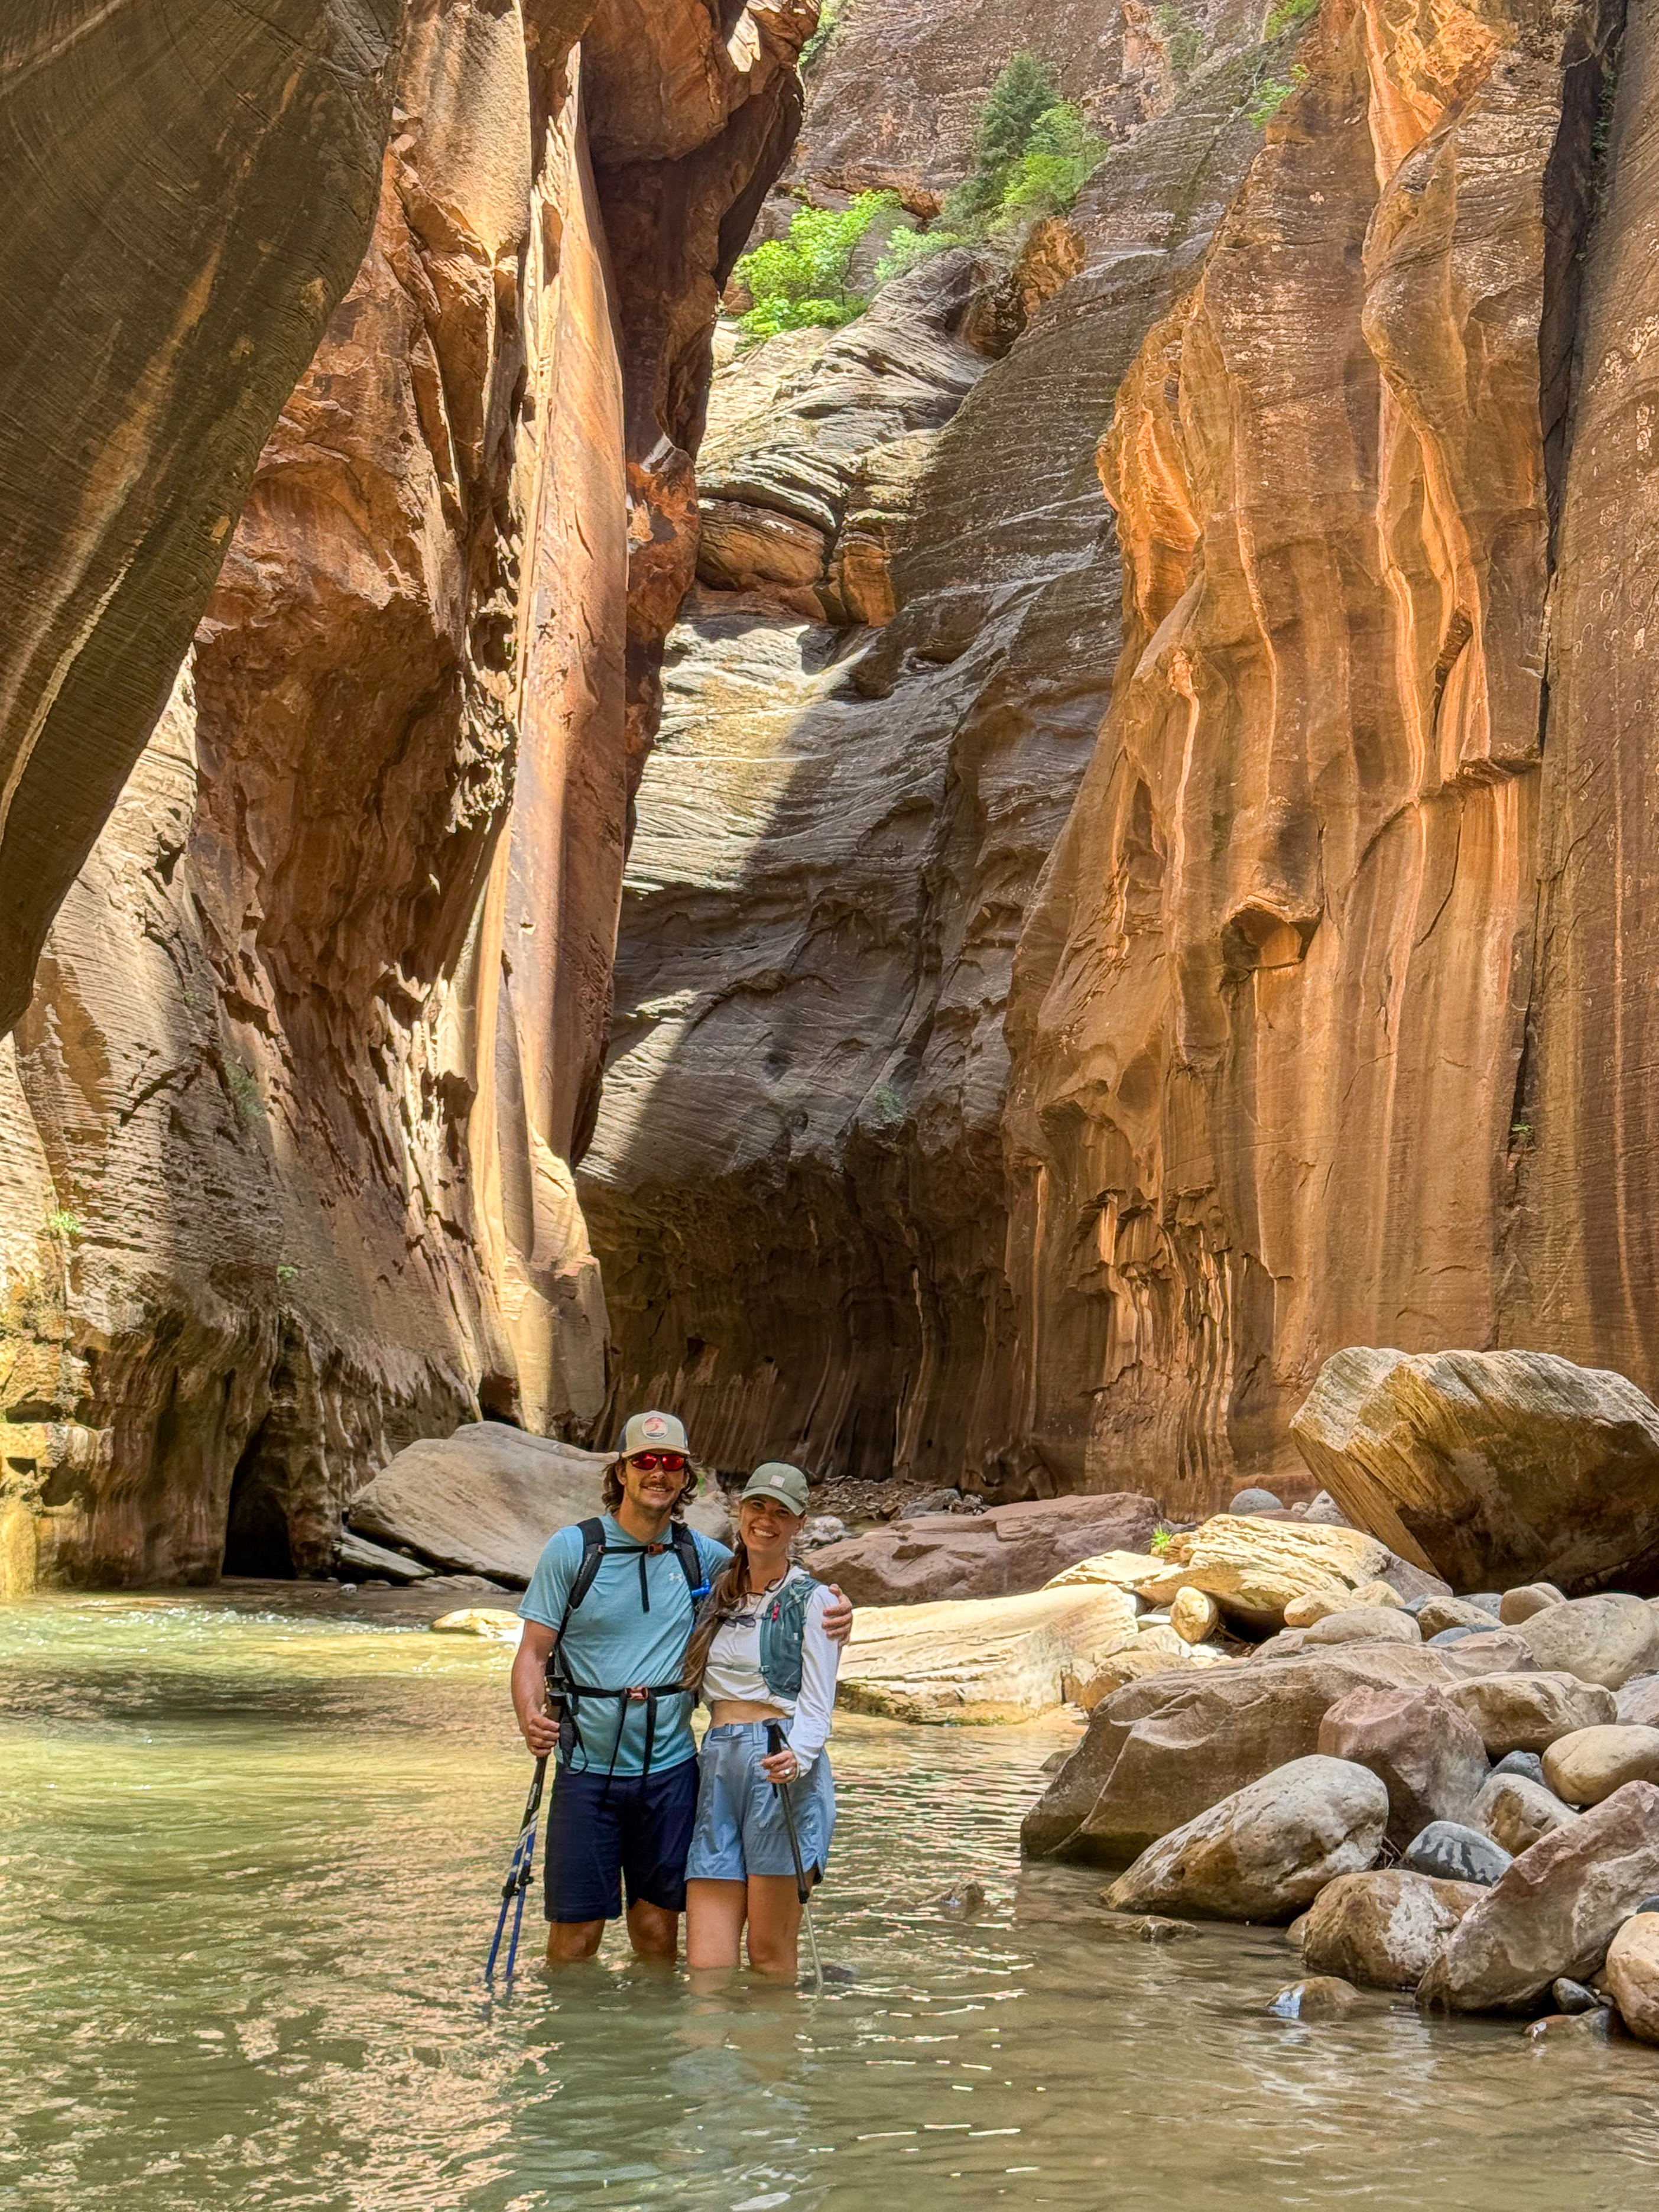
The Narrows in June is a completely different experience than spring or fall. Higher water levels, warmer temperatures, and longer daylight hours create perfect conditions for this iconic hike.
What worked for us:
- Hiking boots (essential) DO NOT DO SANDALS
- Trekking poles for stability
- Dry bag for cameras and snacks
- Started early to avoid afternoon crowds
- Went as far as we felt comfortable (turned back at Wall Street)
Summer-specific tips:
- Water is warmer but still cold—plan accordingly
- Crowds build significantly after 10 AM
- Weather can change quickly in the canyon
- June water levels are typically perfect for most hikers
The mountain climbing surprise
Near Canyon Overlook, we discovered some grade 3 mountain climbing routes that aren’t mentioned in most park guides. Despite stormy conditions, we managed to get in some climbing that added an unexpected adventure element to our Zion experience.
For fellow climbers:
- Bring your own gear (no rentals in the park)
- Check weather conditions carefully
- Start early to avoid heat and crowds
- The rock quality is excellent but different from typical climbing areas
Bryce Canyon: When sunset becomes sunrise
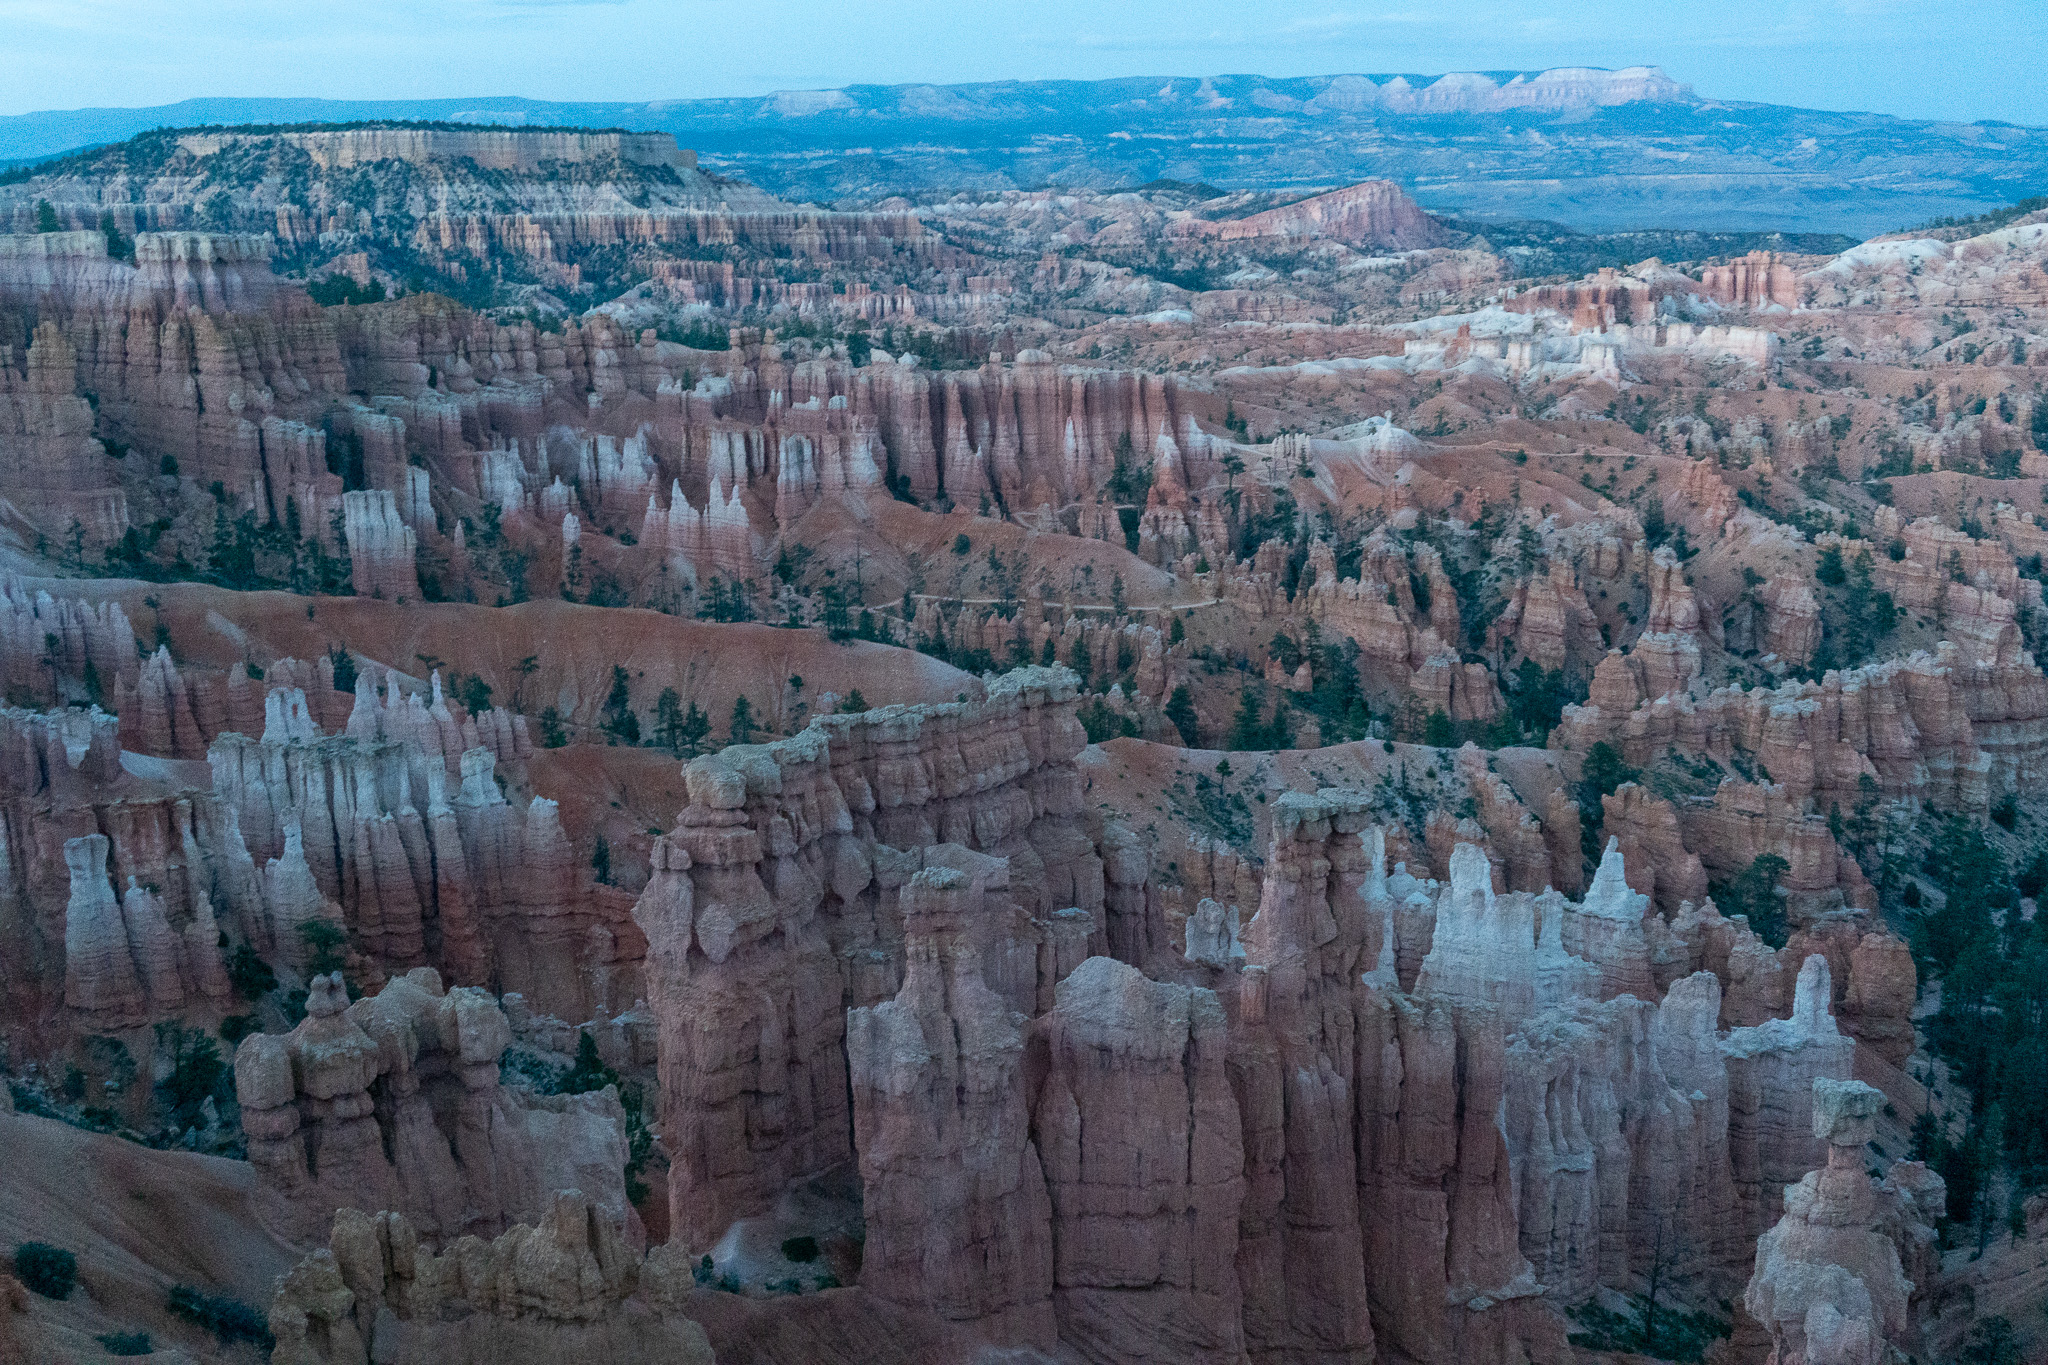
We arrived at Bryce on our final Zion afternoon (June 4th) and caught sunset at Sunset Point—absolutely magical after three days in Zion’s deep canyons. The contrast between Zion’s enclosed feeling and Bryce’s expansive views was breathtaking.
Our abbreviated Bryce experience:
- Sunset Point for the classic golden hour shot
- Navajo Loop Trail (started in daylight, finished in darkness)
- Hiking by headlamp added unexpected adventure
- Wished we had more time but loved the teaser experience
Night hiking reality:
- Bring multiple light sources
- The trail is well-maintained but different in darkness
- Fewer crowds but more challenging navigation
- Created unique memories we still talk about
Capitol Reef: The scenic drive adventure
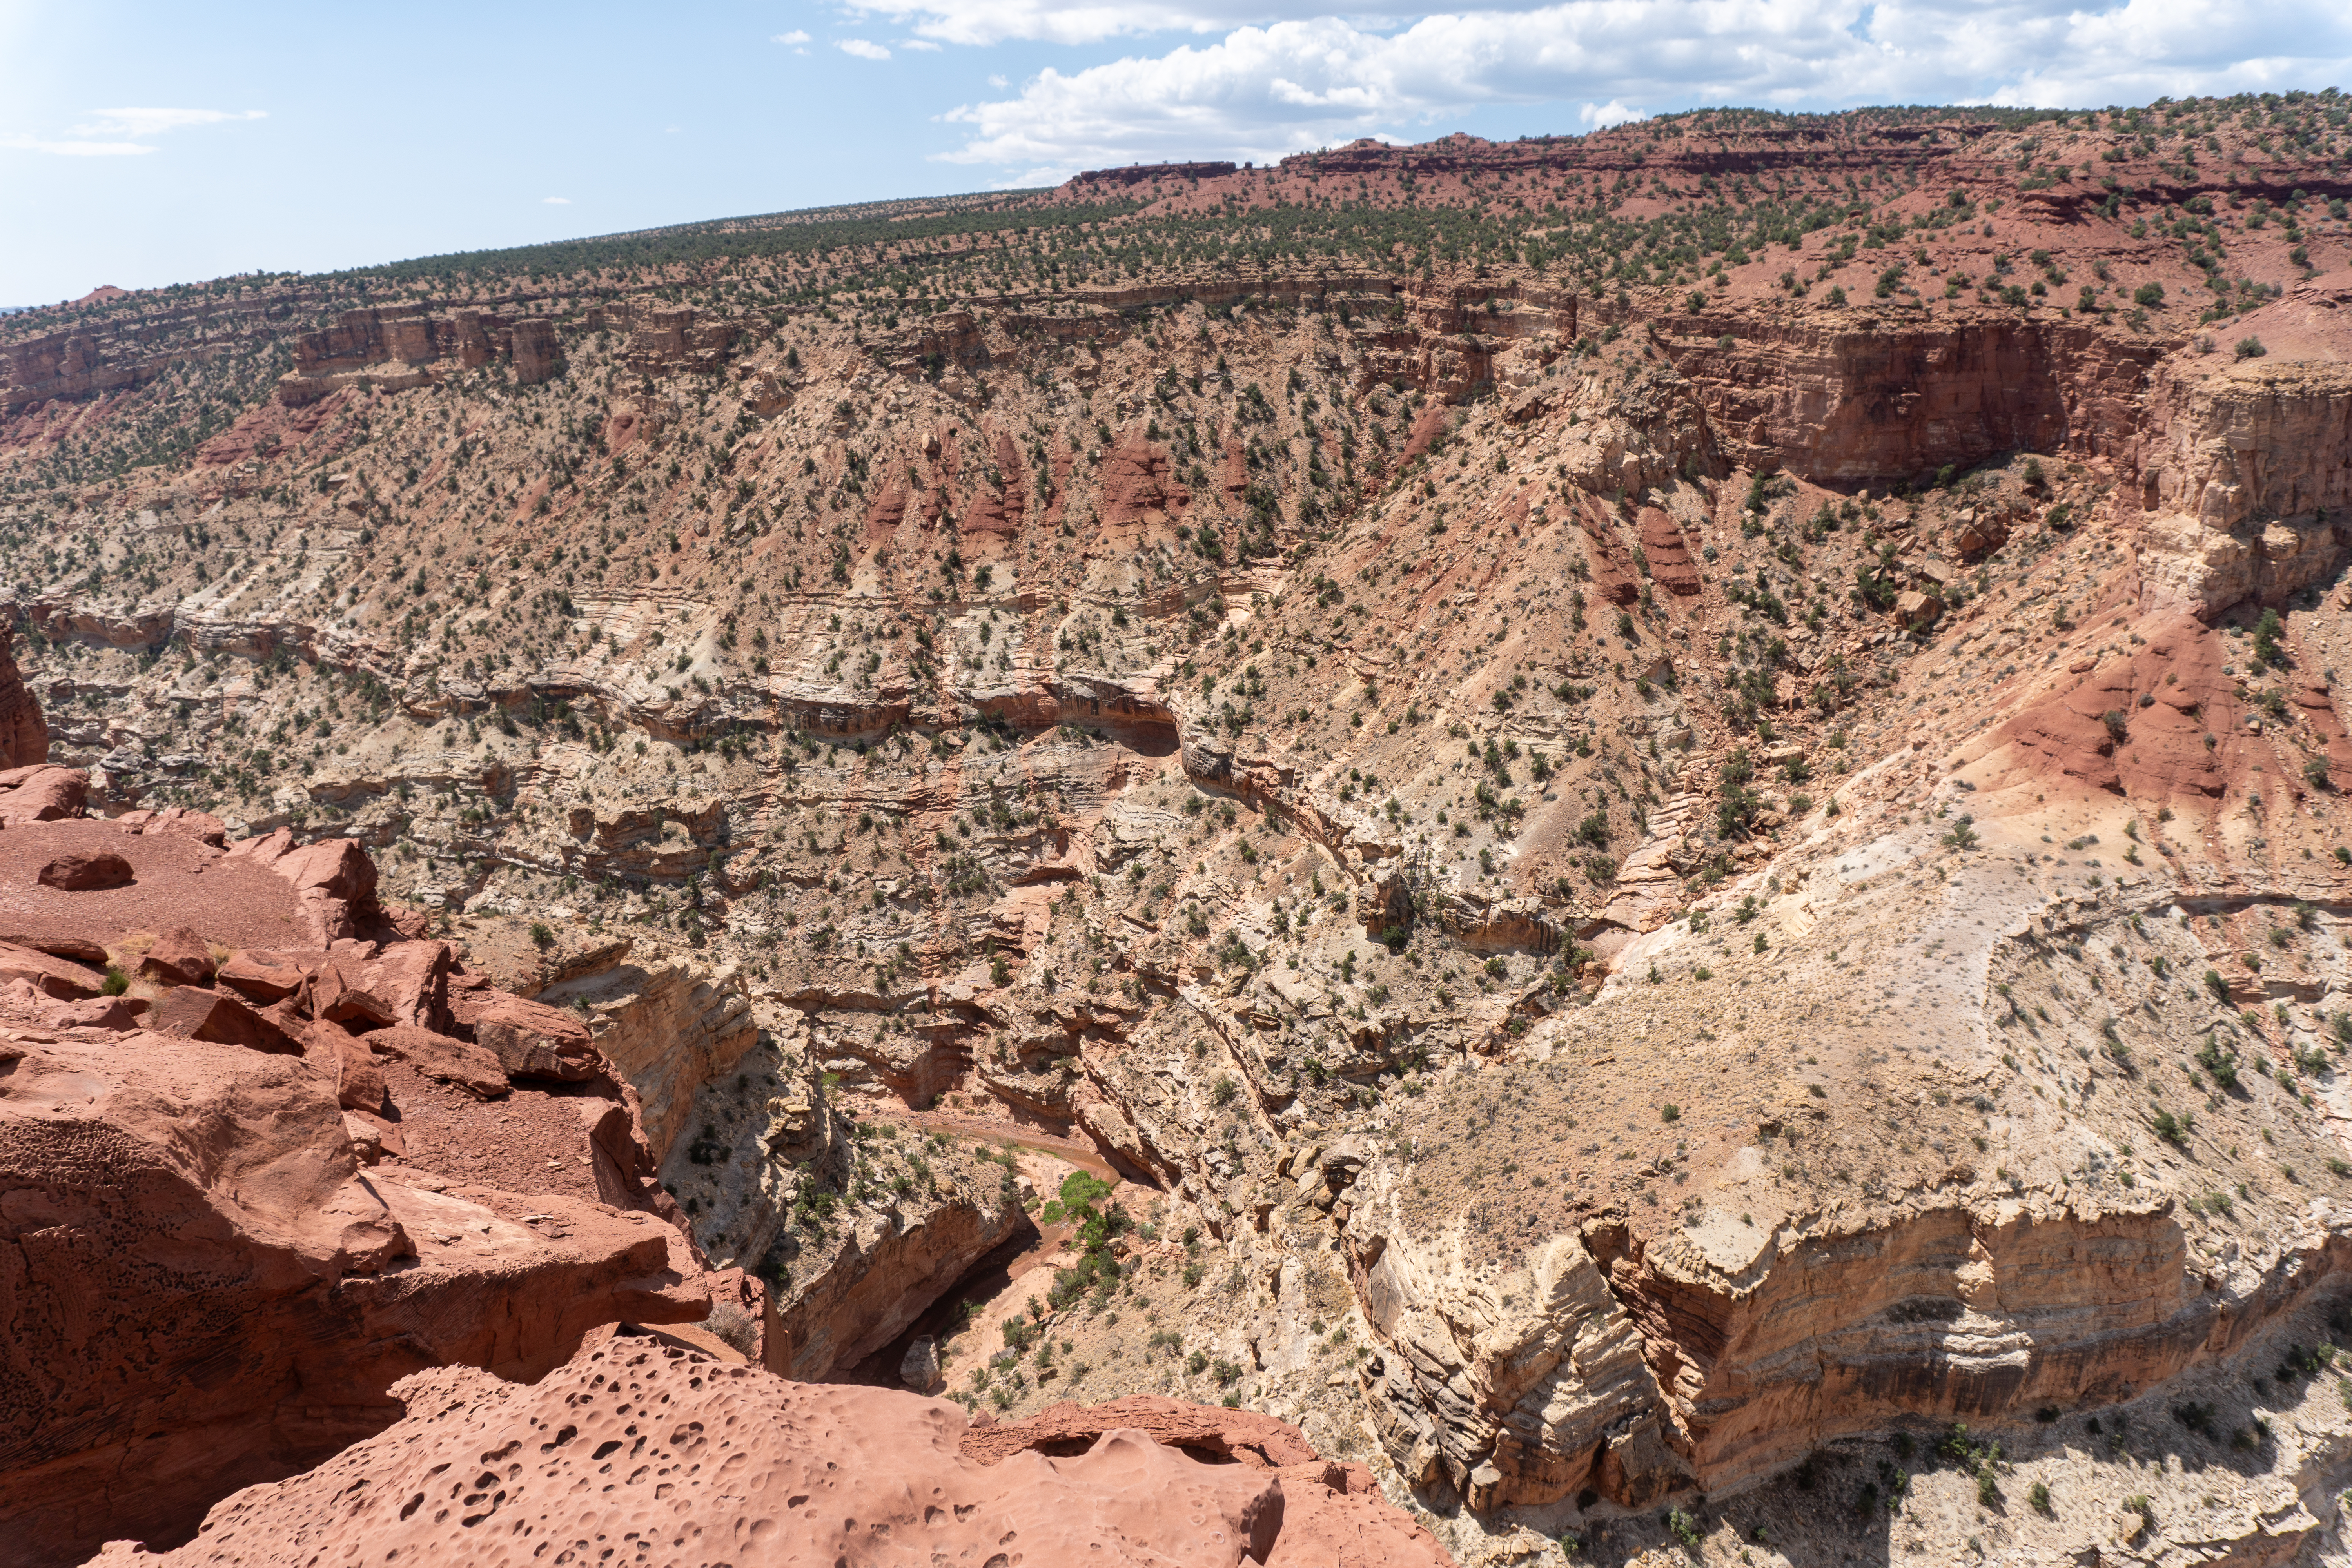
Capitol Reef surprised us with its diversity and the ongoing construction that required constant adaptation. We drove the entire park with multiple stops, including the scenic drive that showcases the park’s geological diversity.
Construction reality check:
- Always check the park website before arrival
- Road conditions change frequently
- Construction actually created unique photo opportunities
- Park rangers provided excellent updated route information
What we loved about Capitol Reef:
- Less crowded than the other four parks
- Incredible geological diversity
- Pioneer history adds cultural context
- Perfect “breather” between intense hiking days
Canyonlands: One day of vastness

Canyonlands deserves more time than we gave it, but our one day in the Island in the Sky district provided incredible perspectives on Utah’s landscape. The vastness and viewpoints offered a different kind of beauty than the other parks.
Our Canyonlands highlights:
- Mesa Arch (though we saved sunrise for Arches)
- Grand View Point Overlook
- Upheaval Dome mystery
- Incredible photography opportunities
One-day strategy:
- Focus on viewpoints rather than long hikes
- Drive the scenic route with strategic stops
- Save energy for your final park
- Appreciate the geological storytelling
Arches: The early bird advantage
Our 5:30 AM start at Arches was the smartest decision of our entire week. We beat the 7 AM timed entry requirement, avoided the building heat, and had popular attractions nearly to ourselves.
Our Arches gameplan:
- Double Arches hike in cool morning temperatures
- Delicate Arch with perfect lighting and minimal crowds
- Drove the entire park scenic route with strategic stops
- Brought plenty of water (it gets hot fast, even in early June)
- Finished before the heat became unbearable
Early morning magic: Starting before dawn meant we experienced Arches in the best possible conditions. The red rock formations glowed in the early light, we had trails mostly to ourselves, and we avoided the intense heat that builds throughout the day.
Essential gear for summer Arches:
- Multiple water bottles per person
- Sun protection (hat, sunscreen, lightweight long sleeves)
- Sturdy hiking shoes for uneven terrain
- Camera with extra batteries (you’ll take hundreds of photos)
The winter return plan
We’re already dreaming about returning to Utah in winter. Fellow van lifers have told us the snow-covered red rocks create an entirely different world—almost like visiting five completely new parks. The contrast of white snow against red sandstone supposedly creates some of the most stunning photography opportunities in the Southwest.
Why winter intrigues us:
- Completely different scenery and photo opportunities
- Fewer crowds in all parks
- Cooler temperatures for longer hikes
- Different wildlife activity
- The challenge of van life in winter conditions
What we’d do differently (and what was perfect)
What worked perfectly:
- Spending three full days in Zion gave us time to really experience it
- Starting Arches super early was brilliant
- Our pre-built van handled everything beautifully
- Being flexible with weather windows paid off
- The Zion-heavy approach matched our priorities
What we’d change for next time:
- Add one more day for Capitol Reef exploration
- Plan more time for Canyonlands hiking
- Research winter road conditions and gear requirements
- Book even further in advance for better campsite selection
- Pack more varied clothing for temperature swings
Essential planning timeline
6 months before:
- Reserve campgrounds (especially Watchman in Zion)
- Research seasonal road closures
- Plan your route and backup options
60 days before:
- Book Angels Landing permits (if attempting)
- Confirm all reservations
- Check park websites for construction updates
1 week before:
- Download offline maps
- Check weather forecasts
- Plan flexible daily schedules
- Stock up on supplies
The community aspect nobody expects
Van life in Utah’s national parks creates instant connections. During our week, we met so many fellow adventurers:
- First-time van lifers from Canada getting their feet wet
- Seasoned travelers sharing secret camping spots
- Young families teaching their kids about geology
- Solo travelers who became temporary hiking partners
- Local van lifers with insider knowledge
How to connect with other van lifers:
- Wave at other vans in campgrounds (it’s van life etiquette)
- Share trail conditions and weather updates
- Offer to take photos for couples and families
- Ask about route recommendations for upcoming parks
- Be generous with information about what you’ve learned
The van life community in Utah is incredibly welcoming because everyone understands the unique challenges of cramming so much beauty into a short timeframe.
Gear that actually mattered
Photography equipment:
- DSLR or mirrorless camera with wide-angle lens
- Polarizing filter for red rock contrast
- Tripod for sunrise/sunset shots
- Extra batteries (cold and heat drain them fast)
- Lens cleaning kit (dust is everywhere)
Hiking essentials:
- Quality hiking boots with ankle support
- Trekking poles for stability
- Plenty of water storage
- Electrolyte supplements
- First aid kit
- Headlamp for early/late adventures
Essential apps and tools:
- The Dyrt: Our go-to for finding both paid and free camping spots, plus user reviews and photos
- FreeRoam: Backup app for dispersed camping locations
- GaiaGPS: Offline maps for exploring forest service roads
- iOverlander: Community-sourced camping and water locations
- Park websites: Always check for real-time construction and road updates
Water strategy:
- Always know your next water source before leaving civilization
- The Dyrt shows water availability at most locations
- Many forest service campgrounds have spigots even if camping is free
- Plan for 1 gallon per person per day minimum in Utah’s dry climate
The verdict: Should you attempt the Mighty 5 in one week?
Absolutely yes, but with realistic expectations. You won’t have time to explore every trail or spend contemplative hours in each park. What you will have is:
- A comprehensive overview of Utah’s geological diversity
- Incredible stories and photos to last a lifetime
- A sense of accomplishment that few van lifers achieve
- Knowledge of which parks deserve return visits (all of them!)
- A week that redefines what’s possible in van life
- Confidence to tackle other ambitious adventures
This challenge is perfect for:
- Van lifers who thrive on structured adventures
- People with limited time who want maximum exposure
- Those comfortable with intense but rewarding travel
- Adventurers who love checking big goals off their list
- Anyone wanting to experience Utah’s geological story
Consider a slower approach if:
- You prefer contemplative, slow travel
- You’re brand new to van life (though we managed at 6 months!)
- You want a relaxing vacation rather than an adventure
- You have unlimited time to explore
Planning your own Mighty 5 adventure
Best times to attempt:
- June-August: Long days, hot weather, all roads open
- April-May: Moderate weather, some snow possible at elevation
- September-October: Perfect temperatures, beautiful lighting
- Avoid: December-March (weather complications, road closures)
Essential advance planning:
- Book Watchman Campground 5-6 months ahead (split with friends if possible!)
- Download The Dyrt app and research free camping areas
- Purchase National Parks Annual Pass online
- Download offline maps for all parks and surrounding national forests
- Plan fuel stops (distances between gas stations can be long)
- Reserve Angels Landing permits exactly when they open
- Research water sources along your planned route
Van requirements:
- Reliable vehicle for 1,300+ miles of driving
- Good tires for mountain roads and varied terrain
- Adequate water storage (Utah is dry!)
- Comfortable sleeping setup (you’ll be tired every night)
- Efficient kitchen for quick meals
Budget planning:
- Consider splitting costs with friends for expensive campgrounds
- Free national forest camping can cut costs dramatically
- Use The Dyrt to find the best free spots near each park
- Gas will be your biggest expense (plan for $300-400)
- National Parks Pass pays for itself immediately
- Budget for water refills and occasional dump station fees
Utah’s Mighty 5 challenge isn’t just about checking parks off a list—it’s about proving to yourself that van life can be both adventurous and achievable, even when you’re still figuring everything out. Yes, it’s exhausting. Yes, you’ll question your sanity. But you’ll also experience some of the most incredible geology on Earth and gain stories that’ll last a lifetime.
We’re already planning our return trip for winter—we’ve heard the scenery feels like a completely different world with snow, and we can’t wait to experience that transformation. Plus, we want more time in Capitol Reef and Canyonlands, the two parks we felt most rushed in.
Being relatively new to full-time van life when we did this challenge actually worked in our favor. We had fewer preconceptions about what was “impossible” and more excitement about pushing our limits. If we could do it at six months in, you absolutely can too.
What’s your biggest concern about attempting the Mighty 5 in one week? Are you leaning toward the full challenge or planning to split it into multiple trips? Have you considered the winter experience? I’d love to hear your thoughts and answer any specific questions about the logistics—this van life community thrives when we share our hard-earned knowledge with each other.


Leave a comment